

Back Next
The configuration tools allow you to set up your server information as well as synchronize your LDAP directory (if necessary), monitor resources, and offers resources for programmers.
To view the available configuration tools on your server, click Config from the Manage... drop-down box.
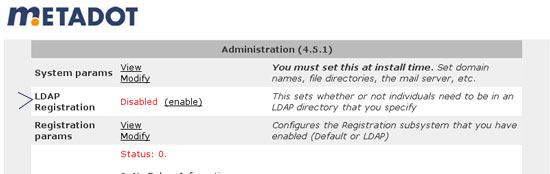
Setting your system parameters allows your Portal software to work within your existing intranet structure.
These parameters allow you to set Session duration (seconds), Mail server address, Mail sender address, Subscription/Discussion account name, Subscription/Discussion host name, Subscription/Discussion password, Root domain name, HTTP script basename, HTTP port number, Home page*, Page after login*, Require Login*, Trusted site*, Enable Event Log*, HTTP proxy address, HTTP proxy port number, Image directory location, Absolute path for file upload directory, Maximum total upload size per user, Maximum total number of upload per user, Maximum number of News Items in Category News List and Subscriptions processing information.
The description below every parameter explains its purpose. The parameter field will be populated with the default value, if any.
Note:
View Parameters displays your Portal's current parameter settings. To change these settings, click Modify System Parameters at the bottom of the page.
A site may now be operated in either 'trusted' or 'non-trusted' mode. The default is 'non-trusted'.
If the site is running in 'non-trusted' mode, then info about users' email addresses is not exposed to non-admins, for example when sending invitations and creating groups. In addition, a non-admin can not search the site's users using only a wildcard expression. (*) -- the search must be constrained to include at least two additional characters.
If the site is running in 'trusted' mode, then users will be able to see emails of other users, and can generate a list of all users by searching on wildcard only.
While the Metadot Portal has good security measures, you may increase the security of your system by using these parameters. To modify these security measures, click Modify Params from the Administration page.
If you have an LDAP server and wish to use it, select the Enable option button next to LDAP Registration and click Modify Registration Params. Otherwise, skip to Step 4.
Enabling this option authenticates users against the LDAP directory upon
registration and every login. This means that if the person is not in the
LDAP directory, they will not be able to use the Portal.
You must enter:
The LDAP server name
The BASE DN
The field name from the LDAP server you wish to authenticate against (usually an employee's email address or employee number)
How you want the field name to be displayed on the Login screen
(for example, "Email:" or "Please enter your email address:")
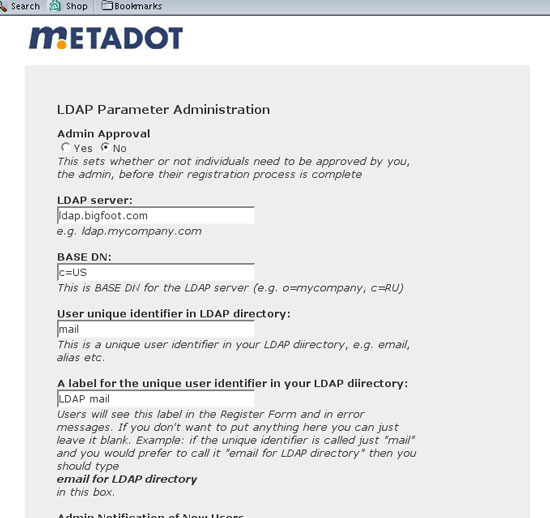
After entering all the required information, click Save.
A strong password is made up of a combination of letters and numbers and cannot contain a word found in a dictionary. If it does not meet all these criteria, the password is rejected.
Selecting a debug mode is useful when adding or changing features in the Portal code or creating new basic tools or gizmos. It performs a stack trace, which lists the methods called as a page is displayed.
You may choose any range of Debug mode from None (the default) to Prepare Aspirin (highest level), depending upon your needs.
Status displays certain system information that is useful for system administrators and programmers wanting to change or add features in the Portal code.
View Environment Variables displays useful information required by programmers who want to change or add features in the Metadot Portal code.
View System Status displays resource and process information about the server. This can help with troubleshooting any hardware problems.
Users must register to have access to your site. After they register, you can either accept them (granting them access to the site) or reject them (denying them access to the site). After accepting or rejecting the user, a letter is generated and sent to them reflecting their status.
This configuration option customizes the message sent out to a user based upon whether the user was accepted or rejected.
Select Config from the Modify... drop-down list.
On the Administration page, go to the Email message section and select Modify the Messages sent by the System.
On the Modify Messages page, follow the instructions to make your changes to the email messages.
Click the Save button at the bottom of the page.
On the Message Example page, look over the examples carefully:
If there are more changes to make, click Modify Messages at the bottom of the page. This returns you to the Modify Messages page, where you can make more changes.
If you are satisfied with the changes, select Show Administration Page at the bottom of the page. This returns you to the Administration page.
![]()
Back Next
© Copyright Metadot Corporation 2002. All rights reserved.